Showing posts with label tutorial. Show all posts

Thursday, 25 December 2014

Christmas time is here - How to craft some quirky Christmas cards


Merry Christmas everybody! I hope you have a lovely time with your loved ones - 
enjoying being together, enjoying a lovely decorated house, lovely food and well thought out presents.

I had to do some major Christmas shopping to do before Christmas Eve, that’s why I’m running a little late with this blog post.

While we’re talking about Christmas shopping, do you find it hard to be all secretive about the good things you just bought? When I buy a present, I want to give it to the concerned person right away. “Last Minute” Christmas shopping is definitely the right for me; otherwise I wouldn’t be able to cope with all the suspense.


I want to show you how I made my handcrafted Christmas cards this year. I definitely needed a quick crafty fix to make me feel Christmassy for the time leading up to Christmas.

As you can see again, I can't help going for bright colours. With six hours of daylight, I don't feel like the traditional dark green and Santa red. I need something more quirky and fun.  


You need:
- Cards and envelopes made from recycled paper
- Burlap like fabric
- Felt scraps 
- Pritt stick 
- Scissor

How to do it:
1.     Cut out lots of little dots out of the felt scraps.
2.     Then cut out the Christmas tree out of the burlap like fabric. It helps folding the fabric in the middle when cutting to make both sides of the tree similar looking.
3.     Glue the tree shaped fabric onto the card using a Pritt stick. Don’t use fluid glue as it will make the card go wrinkly.
4.     Then start arranging the different coloured felt dots onto the Christmas tree and glue them on with the Pritt stick. Different colours set a different tone as you can see in the below example. 


If you have an idea on a quick crafty Christmas project you want to share, post the link and I have a visit! :)

Wednesday, 1 January 2014

What about some pretty Winter Decoration for the New Year?


I hope you all had a wonderful Christmas and a good start to the New Year 2014.

I had an amazing Christmas this year with my family staying over. We crafted and decorated the house with festive paper chains, candle lanterns and Christmas tree decorations. My boyfriend cooked a festive meal on the 25th - turkey with roast vegetables. I do have to admit though, that I'm not much of a Christmas pudding fan. 

I had also tremendous fun buying gifts for everyone. My brother really enjoys watching British comedies, such as "Black Books" and "The IT Crowd", to name a few. It was recommended that I get him Channel 4 classic "Green Wing" to go with "Spaced" that I'd already bought. I hadn't seen it before and was a bit baffled when I started watching it yesterday. I began to second guess if he'd like it? Luckily he loves it, and he advised me that he thought that it would take me about 8 episodes to get used to the humour. We shall see.

"Spaced" on the other hand... I can really relate with the character of the artist Brian. I think it is the best parody of an artist ever made. This strange man - who lives on the ground floor of this apartment house, trying to be creative and to express his troubled emotions, epic - I would highly recommend it!


We got rid of our Christmas tree quite early this time, because we have a small house and it was nice to get the space back, especially for crafting. We still have some decorations remaining including some silver sparkly twigs, decorated with handmade felt baubles. 

You will need:
- Twigs (you get the sprayed ones from the florist, or you can spray them yourself)
- Felt (a good way to use up some felt scraps)
- Various pearls and beads
- Fabric scissors
- Pearl cotton embroidery floss
- Needle

So here is a quick How-To:
1. Cut out little circles of the felt scraps in various sizes and colours. 
2. Thread the needle and pick up a bead to fix it with a knot to mark the start.
3. You can add some more beads or start threading the felt circles. To achieve the form of a bauble, start     
    picking small circles moving to bigger ones and then picking smaller ones towards the end again.
4. When you are finished threading, fix the pile of felt circles with a bead and a knot. 
5. Make a little loop out of the rest of the thread, to have a little hook to hang up the felt bauble. 


I wish everyone a happy new year for 2014, may all your wishes come true!

Wednesday, 18 December 2013

A new approach: the Christmas Wreath


I am so excited that my family will come to the UK to celebrate Christmas with us. That will be the first time, that I will host Christmas at my home. Luckily Steve is a great chef, which will save us from any dissappointment of me cooking. I am now all about decorating the house; we even bought a real Christmas tree, which fills the living room with the scent of pine twigs. 

There are some differences in how Germany and the UK celebrate Christmas. The best known one is probably that in Germany presents are given in the evening of the 24th, where in the UK it's in the morning of the 25th. Germany versus UK, it's Christmas markets, Vanillegipferl, Stollen, Advent Wreath versus Christmas crackers, Mince pies, Christmas jumpers and Christmas pudding.

One of my current craft projects is a Christmas wreath. This popular Christmas decoration represents the everlasting life given by Jesus. In Germany it is more common to have an Advent Wreath, which has four candles, each representing an Advent Sunday. Each Sunday a candle gets lit until Christmas has arrived. 

Besides the traditional colours of green, red and gold, it recently becomes more popular to have a colourful approach on Christmas Decoration with pastel shades and neon colours. A shopping tour to Paperchase inspired me to do a Christmas wreath myself, using sparkling sequins and Scandinavian design. 

 What you will need:
- Black jewellery wire (0,6 mm/10 m)
- Clematis willow wreath (40 cm)
- Pierced multicolour sequins
- Wire cutter


Start by threading the sequins on the wire. You can pick each sequin with the wire cutter and twist the wire until the sequin seats tightly. Leave 5 mm space before twisting the next sequin. 


You can divide the wire in parts of one meter lengh. Now it is easy to wrap the sequined wire around the willow wreath. To avoid loose ends just twist the ends of the wires together, where they meet. 


You can decorate the wreath with a ribbon bow and hang baubles, Christmas figures, jingle bells or a written blessing in the centre.

For the final touch I decided to sew a white dove, a symbol of peace (the dove that returned to Noah's ark with an olive leaf). I made it out of white felt and embroidered it with pearl cotton (pink, orange, turquoise) and some lovely ribbon I found in my favourite sewing shop Naden und Faden (Needle and Thread) back in my hometown Lübeck in Germany.


I hope you all have a lovely time decorating your homes for Christmas and getting excited of spending some lovely time with your family and close ones! Countdown is running! x

Wednesday, 13 November 2013

What's his name, Mr. Bauble Bunting or Mr. Potato?


I made this little Soft Toy as a birthday present for a friend. I gave him the name "Mr. Bauble Bunting" inspired by christmas baubles and bunting. It's a catchy name that resulted in my boyfriend singing his name in Jamaican reggae style (and became a tune that sticks to your head!). 
Since the actual Birthday party, Mr. Bauble Bunting had a name change, because everyone called him Mr. Potato man. I guess this name does fit much better!


One of my favourite parts in the process is picking the colour scheme. 
The felt is available in so many wonderful bright colours, which makes it fun to experiment with.

My choice of a 5 colours scheme was: yellow, pastel green, pink, orange and turquoise.


You will need:
- Felt (5x different colours)
- Plain fabric (I used Lenda Beige from IKEA)
- Pearl Cotton thread or a fabric pen
- Pencil
- Scissors
- Cardboard for the stencil
- Pins
- Sewing thread / needle
- Ribbon


Quick tutorial
1. I made a stencil out of cardboard and marked the shape onto the fabric with a pencil. Then I 
    cut around the shape creating a 1 cm boarder to have some overlapping fabric for when 
    sewing the back and front together later in the process.
2. I cut a few felt triangles from each colour and placed them on the fabric. Then I fixed 
    triangles of the same colour in a row with needles (when attached like this, you can sew 
   easily over them with the sewing machine).
3. I sewed twice over the row of felt triangles. 
4. Then I repeated the procedure with the next row of felt triangles...
5. ... until the rows were complete. 
6. I drew the face with a fabric pen and then stitched the lines with the indigo pearl cotton 
    thread. I cut out two little circles of the pink felt to use as cheeks and hand sewed them onto 
    the face.
7. I used some ribbons for the hair and sewed them to the fabric pointing inwards.
8. I fixed the overlapping felt with needles, so that when I sew the insides together with the
    sewing machine, they won't be caught in-between the seam.
8. Then I turned the toy inside out and stuffed it with wadding. 


One of my favourite moments when making soft toys is the moment when you finally can turn the inside out. Then you finally get to see how the idea works out, and how the soft toy comes to life.


I guess it's up to my friend to get to know him better, she has him now - so I can't tell you much about this guy. 
I will ask her though next time I see her how he's doing :)

Have you ever made a present, where the recipient of the gift saw something else in it and named/used it differently?

Sunday, 29 September 2013

Tutorial for a DADA Sound Poem


The following idea is based on an exercise by my former Art teacher Mr. Rose in college.
I had so much fun when doing it and learned so much on DADA and Art history, that I want it to share with you. 

I love love love DADA! It's a source of inspiration for me, because of its multi media use, its nonsense and absurdity.

I don't know how popular DADA is, so I guess I’ll just start with a short introduction.

DADA was an art movement in the early 20th century of the European avant-garde. It started probably in Zürich around 1915 and then spread to Berlin, New York and other cities. Artists protested against the First World War and the bourgeois culture with provocation and satirical nonsense. DADA inspired Collage, Photomontage, Assemblage, Ready Mades and Sound poetry. Famous artists involved where Max Ernst, Salvador Dali, Hans Arp, Marcel Duchamp and Kurt Schwitters.

Sound poetry uses the phonetic aspects’ of human speech.
 In times of DADA it was often part of a public performance. Here is a famous poem by DADAist Hugo Ball:

Karawane
jolifanto bambla ô falli bambla
grossiga m'pfa habla horem
égiga goramen
higo bloiko russula huju
h`ollaka hollala
anlogo bung
blago bung
bosso fataka
ü üü ü
schampa wulla wussa ólobo
hej tatta gôrem
eschige zunbada
wulubu ssubudu uluw ssubudu
tumba ba- umf
kusagauma
ba- umf

If you are brave enough, print out the sound poem "Karawane", position yourself in the middle of your living room; maybe with a few unlucky spectators and read the poem out loud ... have fun!


You should now have an idea of sound poetry and maybe even had a go at it. Now how about making your own sound poem...


What you will need:
- Different magazines
- Scissors
- Cardboard or drawing paper
- Glue


  • Get some magazines and start cutting out different headlines. The letters should be 1/3 cm high (0.4-1.2 inches). If you have different magazines, you have a better chance of getting words in different typography and colours, which will make the visual later more interesting


  • Get a good pile of words. Cut out the words into different letters and sort them into the alphabet. A few letters each is enough, otherwise it becomes an exercise in OCD. 


  • Get the cardboard, scissors and some glue and get started imagining some new words. A sound poem is an acoustic experience. It helps using lots of vowels and nice sounding letters like R, K, P, S and Z.


  • And Voilà. You can frame your work for display – and remember to rehearse in case someone asks what it is.


Wednesday, 11 September 2013

Tutorial for a Tipi Triangle Picture


I'm currently painting pictures to decorate our house. While I was doing the Triangle Picture, I thought, it could be an interesting thing to share. I hope it inspires you! :)

What you will need:

- 220 gsm Drawing Paper (strong surface for repeated working), a few A3 sheets
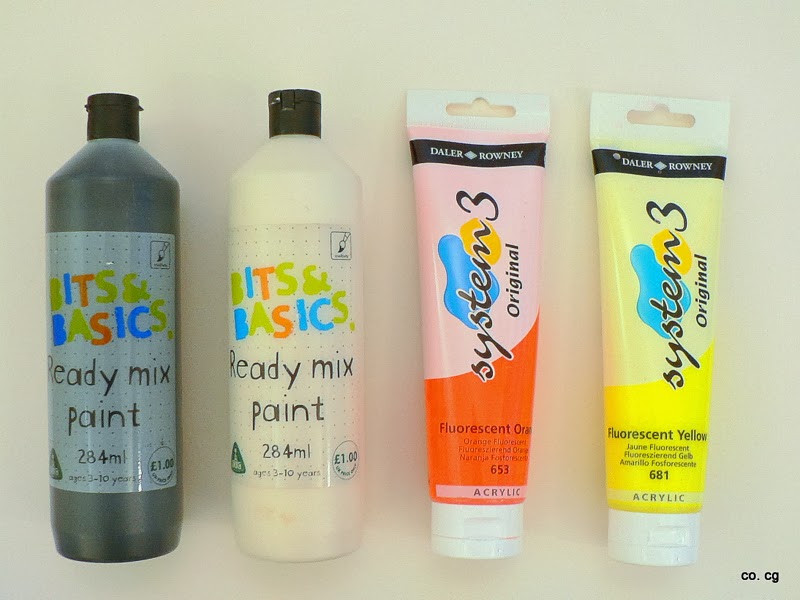
- Colours: black, white, NEON orange and NEON yellow
- Permanent Marker
- Cardboard for the stencil
- Pencil, rubber, scissor, set square or ruler
  1. At first you need to apply a white foundation to the backround paper. This gives it texture and adds depth  to the picture.
  1. While the white paint is drying, you need to figure out what colour palette you want to use for the triangles. I went for:
    • NEON orange pastel shades (NEON orange mixed with white)
    • NEON yellow pastel shades (NEON yellow mixed with white)
    • Grey (black mixed with white)
    • Black


  1. Then you have to paint different sheets of paper with the colour shades. 2-3 coats makes the paint opaque. I love to paint with a coarse bristle brush, which adds structure and leaves the bristle lines visible. 


  1. For the stencil, you need cardboard paper, a pencil and a set square. First, draw a 4cm x 4cm (about 1.5 x 1.5 inches) square. Then half the top line of the square. Join this point with the two edges that lie on the other side of the square. Voilà, the shape of a triangle. Cut it out and use it as a stencil to copy the shape on the rear of the painted paper. Now, you can cut out the triangles.


  1. A good tip is to use a black permanent marker to colour the cut edges of the black triangle. Later, when the black triangles are applied on the picture, it will make them look more plain and clean.


  1. Once you have a good pile of each colour, place them randomly on the picture. You can decide to have one colour slightly more than another in one area, but normally it's best not to be too conscious about your choices.


  1. Use the black triangles sparingly, as it is the most solid colour. Maybe 4 - 5 pieces are enough.


  1. Now you can glue the triangles to the picture. To finish, cut some of the triangle in half and glue them to the sides of the pattern to make the final impression of the picture square complete. While the picture is drying, I placed some heavy books on top of them, so that the triangles are glued flattened to the paper (the complete hardback edition of Lord of the Rings is always handy).


  1. Once dry and framed, enjoy finding a suitable spot in your home to hang your handiwork and enjoy :)


updated 20/09/13
Google Analytics Alternative