Showing posts with label neon colour. Show all posts

Wednesday, 19 February 2014

Filou, the flounder


I can re-assure you, Filou is still alive. I haven't eaten him, I promise!

How it all started: I love flicking through the cooking books of Hugh Fearnley Whittingstall. Not because I'm looking for recipes (you know that cooking is not my favourite past time, although eating is), but rather to enjoy the lovely illustrations. I particularly like the book "Hugh's Three Good Things", which has previously inspired my vegetable bunting

I have to write a little bit more about Hugh Fearnley Whittingstall as he is such an inspiring person. In 1999, the London journalist moved to the countryside of Dorset, to film a TV show about how he dealt with becoming a self sufficient small holder in the series "Escape to River Cottage".

 Along the way he shows how he deals with occuring problems due to his own inexpericence, gives insight in country life and  introduces the local farmers.

As the TV Series becomes more popular, he started expanding his adventures - included fishing, foraging, going on mushroom forray, seasonal farming, chicking holding, cheese making, bread baking, preserving, home brewing and much more. Besides his cooking books he has another more specific series of books "River Cottage Handbook No.1-10", in which he lets specialists detail about their own area of expertise (e.g. bread baking, brewing). 

He now supports many campaigns, like Hugh's Fish Fight (saving certain areas in the sea for fish population recovery. By the way, Tim Mälzer is a huge supporter of this campaign in Germany), Chicken-out Campaign (to stop chicken from being reared in cages for egg production or fatting them to sell the meat), the Land Share Project (to re-purpose unused land for allotments) and much more.

I respect Hugh as he is a man of simplicity who likes to share his gifts with others, is happy to trade knowledge and talent, he enjoys engaging with the community and promotes healthy living, and all in all he's very down-to-earth. It always inspires me to see what a single person can do to help others.  

Coming back to where I started ... I saw the quirky drawing of a flatfish in one of Hugh's cooking books, and so I decided to sew one just for the fun of it. 


I finally got round to using the embroidery foot of my sewing machine to embroider the felt patches and to create the textured scaling of the fish. Unintentionally, the embroidered scales created bubbles, which although probably wrong, I think looks great.

Another premier was the "quilting" of the fins and tail of the flounder. I stuffed the pre-sewed fabric with wadding and embroidered it with a wave like pattern.


I used up nearly all of my fluorescent NEON thread which I bought at Lidl, so I was very happy when I discovered, that Hobby Craft now finally stocks the NEON thread from Gütermann. I could stare for hours at my new NEON threads, my little gems.


What do you think of the new NEON threads from Gütermann and for what sewing project would you like to use them for?

Thursday, 6 February 2014

Paper Cutting - please cut here


The past weeks have been a bit tough on me. Due to commuting I wasn't able to do much crafting. When I finally had the time, crafting felt like working from a to-do list. It actually felt like duty, not a pleasure. How can you share joy in a blog if you don't enjoy yourself?

But Happy Days! I'm now waiting for my new part time job to start, which will be just around the corner. I enjoyed a few days off and I've recharged my batteries. Now I am slowly starting to get creative again and playing around with ideas.

When I can't do crafting, like the past weeks, I tend to buy craft books as a surrogate (although it works only as a 5% replacement and then I get jealous of the cool stuff other people do).
The past few weeks I piled up a nice collection of "Mollie Makes Specials" and Sewing books like "50 Fabric Animals" and "So Pretty! Felt" which I now flick through in enjoyment and am inspired.

What I learned so far of myself is that I like to sew or craft things based on my own designs. It would be easier to learn sewing techniques by following tutorials but I find following a tutorial 1:1 is sometimes a bit boring as there is no place for spontaneity or creativity.

Unfortunately working from my own designs makes the process predestined for mistakes ... And correcting them can be quite time consuming e.g. Yesterday I worked on a table runner with geometric felt shapes but then it reminded me of the scarecrow in "Wizard of Oz" and I had to stop sewing. I blame the square patches for it.


The photos in this blog post show some paper cutting I made in January. Paper Cutting is a fun technique and easy to do if you don't have enough time for more complex projects. As you can probably imagine, it was the perfect occasion to use my old favourite NEON coloured paper again. Below you can see a list of my Paper Cutting Designs, in chronological order:

- The little hut in the woods
- The Palace of the Maharaja
- Family Welcome Sign
- Matryoshka 


Paper cutting has a really interesting history as it was first documented in China in the 6th century. From there it spread out to other cultures and countries which evolved their own technique and style. Paper cutting experienced recently a revival in modern art. Contemporary artists (e.g. Mia Perlman, Rob Ryan, Béatrice Coron) and their works are introduced in the inspiring book "Paper Cutting" by Chronicle Books, which I can't recommend highly enough! It's beautiful! 


Monday, 20 January 2014

Once upon a time


The past weeks have been interesting for me. I've joined "The Big Blogging Bootcamp" with Elizabeth Sellers - her blog Rosalilium - in the beginning of January. Besides learning a lot of new stuff and being able to ask questions. It's great to meet some many other keen bloggers who are interested to share and to exchange experiences. 


Another change to come is my new part time job, which will hopefully give me spare time again to follow up creative ideas on sewing and crafting.
I received some great Christmas presents: a light box (inclusive daylight lamps and a tripod) and a graphics tablet. Maybe you notice that I'm trying to figure out how the light box works for taking photos. The graphics tablet is a more complex thing to discover, but it essentially works like drawing with pens. The difficult part is to figure out all the functions on the drawing program, like the freeware GIMP. 

The following months, I would like to write more about the book "The Artist's Way" by Julia Cameron.The book is actually a 12 week course in discovering and recovering your creative self, consisting of a weekly task list and weekly essays. Additionally you have to write a morning journal and go regularly on an artist date to fill your creative source. I read the book when I was twenty years old, recommended by a creative friend who got the book recommended by a creative friend and so on. Since that time the book proved itself to be a great support on various occasions, like a good friend who whispers words of encouragement in your ear when you need it.
* You can find now a complete online course on Julia Cameron's website, have a look.

Have you had a book in your life that inspired you and changed your creative life? Have you read "The Artist's Way" yourself and what are your experiences with it?

Wednesday, 11 September 2013

Tutorial for a Tipi Triangle Picture


I'm currently painting pictures to decorate our house. While I was doing the Triangle Picture, I thought, it could be an interesting thing to share. I hope it inspires you! :)

What you will need:

- 220 gsm Drawing Paper (strong surface for repeated working), a few A3 sheets
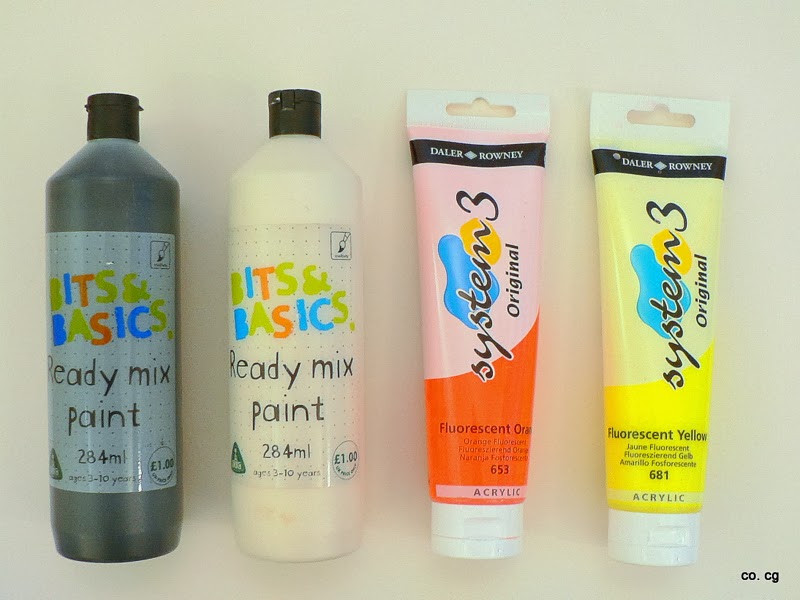
- Colours: black, white, NEON orange and NEON yellow
- Permanent Marker
- Cardboard for the stencil
- Pencil, rubber, scissor, set square or ruler
  1. At first you need to apply a white foundation to the backround paper. This gives it texture and adds depth  to the picture.
  1. While the white paint is drying, you need to figure out what colour palette you want to use for the triangles. I went for:
    • NEON orange pastel shades (NEON orange mixed with white)
    • NEON yellow pastel shades (NEON yellow mixed with white)
    • Grey (black mixed with white)
    • Black


  1. Then you have to paint different sheets of paper with the colour shades. 2-3 coats makes the paint opaque. I love to paint with a coarse bristle brush, which adds structure and leaves the bristle lines visible. 


  1. For the stencil, you need cardboard paper, a pencil and a set square. First, draw a 4cm x 4cm (about 1.5 x 1.5 inches) square. Then half the top line of the square. Join this point with the two edges that lie on the other side of the square. Voilà, the shape of a triangle. Cut it out and use it as a stencil to copy the shape on the rear of the painted paper. Now, you can cut out the triangles.


  1. A good tip is to use a black permanent marker to colour the cut edges of the black triangle. Later, when the black triangles are applied on the picture, it will make them look more plain and clean.


  1. Once you have a good pile of each colour, place them randomly on the picture. You can decide to have one colour slightly more than another in one area, but normally it's best not to be too conscious about your choices.


  1. Use the black triangles sparingly, as it is the most solid colour. Maybe 4 - 5 pieces are enough.


  1. Now you can glue the triangles to the picture. To finish, cut some of the triangle in half and glue them to the sides of the pattern to make the final impression of the picture square complete. While the picture is drying, I placed some heavy books on top of them, so that the triangles are glued flattened to the paper (the complete hardback edition of Lord of the Rings is always handy).


  1. Once dry and framed, enjoy finding a suitable spot in your home to hang your handiwork and enjoy :)


updated 20/09/13

Tuesday, 13 August 2013

The NEON Warriors


Here's is something I am currently working on.
I call them the Neon Warriors. So far they haven't introduced themselves by name.
Below you can find some sketches I made in preparation for the sewing project.

Hier ist ein Projekt, an dem ich gerade arbeite.

Ich nenne Sie die Neon Krieger. Weiter haben Sie sich mir bisher nicht vorgestellt.
Unter dem Text findet ihr eine Vorzeichnung für die Nähidee.  


This morning I got started. I cut out the pieces for the body, legs and arms. The Aztec shapes are made of geometric patterns of felt which I glued onto the underlay. Luckily I found some NEON pink, orange, and green felt at the local market. Tomorrow some pretty sewing and then - how exciting - we will see how they look in real life.

Heute Morgen habe ich damit begonnen die Einzelteile für den Körper, die Arme und die Beine, auszuschneiden. Die Azteken Muster sind aus geometrischen Formen aus Filz gemacht, welche auf einen Untergrund geklebt sind. Ich freue mich, das ich NEON pinken, - orangen und - grünen Filz auf dem Markt gefunden  habe. Morgen dann Nähen, und dann - wie aufregend - sehen, wie Sie sich im richtigen Leben machen.


Friday, 9 August 2013

Kato, the Lion

Below, you can find a picture of the soft toy lion Kato.
I used felt, embroidery floss and a plain cotton fabric.

Unter dem Text ist ein Bild von dem Stofflöwen Kato.

Verwendet habe ich Filz, Stickgarn und groben Baumwollstoff. 


He loves pizza and sandwiches. Unfortunately he's a bad cook and eats ready meals, although he should know better. Most of the time, he prefers lying on his green meadow, keeping the grass at a perfect English height (with his lawnmower) and counting daisies.

Er liebt Pizza und Butterbrote. Leider ist ein schlechter Koch und isst Fertiggerichte, obwohl er es besser wissen sollte. Die meiste Zeit liegt er auf seiner Wiese, trimmt das Gras auf eine perfekte englische Länge (mit seinem Rasenmäher) und zählt Gänseblümchen.


Google Analytics Alternative