Showing posts with label illustration. Show all posts

Wednesday, 11 September 2013

Tutorial for a Tipi Triangle Picture


I'm currently painting pictures to decorate our house. While I was doing the Triangle Picture, I thought, it could be an interesting thing to share. I hope it inspires you! :)

What you will need:

- 220 gsm Drawing Paper (strong surface for repeated working), a few A3 sheets
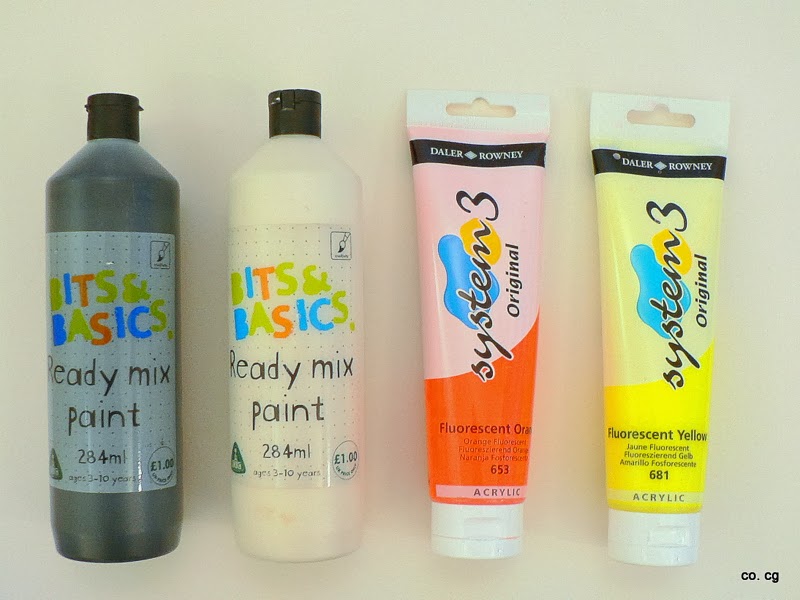
- Colours: black, white, NEON orange and NEON yellow
- Permanent Marker
- Cardboard for the stencil
- Pencil, rubber, scissor, set square or ruler
  1. At first you need to apply a white foundation to the backround paper. This gives it texture and adds depth  to the picture.
  1. While the white paint is drying, you need to figure out what colour palette you want to use for the triangles. I went for:
    • NEON orange pastel shades (NEON orange mixed with white)
    • NEON yellow pastel shades (NEON yellow mixed with white)
    • Grey (black mixed with white)
    • Black


  1. Then you have to paint different sheets of paper with the colour shades. 2-3 coats makes the paint opaque. I love to paint with a coarse bristle brush, which adds structure and leaves the bristle lines visible. 


  1. For the stencil, you need cardboard paper, a pencil and a set square. First, draw a 4cm x 4cm (about 1.5 x 1.5 inches) square. Then half the top line of the square. Join this point with the two edges that lie on the other side of the square. Voilà, the shape of a triangle. Cut it out and use it as a stencil to copy the shape on the rear of the painted paper. Now, you can cut out the triangles.


  1. A good tip is to use a black permanent marker to colour the cut edges of the black triangle. Later, when the black triangles are applied on the picture, it will make them look more plain and clean.


  1. Once you have a good pile of each colour, place them randomly on the picture. You can decide to have one colour slightly more than another in one area, but normally it's best not to be too conscious about your choices.


  1. Use the black triangles sparingly, as it is the most solid colour. Maybe 4 - 5 pieces are enough.


  1. Now you can glue the triangles to the picture. To finish, cut some of the triangle in half and glue them to the sides of the pattern to make the final impression of the picture square complete. While the picture is drying, I placed some heavy books on top of them, so that the triangles are glued flattened to the paper (the complete hardback edition of Lord of the Rings is always handy).


  1. Once dry and framed, enjoy finding a suitable spot in your home to hang your handiwork and enjoy :)


updated 20/09/13

Saturday, 31 August 2013

Bunting with felt vegetables applications - Part 1

Again, it starts with one of my sketches. This time I am inspired to a make a bunting for my boyfriend who is into gardening and of course, into barbequing. He's about to build a barbeque by himself with bricks. I will post a picture when it's built.
But back to where I started. So, harvest is getting closer. And every good barbeque to celebrate the end of summer needs some decorating.

Wiedermal beginnt es mit einen von meinen Skizzen. Dieses Mal möchte ich Fähnchen für meinen Freund machen, der Hobbygärtner ist und, wie sollte es auch anders sein, liebt er es zu Grillen. Er ist gerade dabei selbst einen Grill aus Backsteinen zu bauen. Sobald er fertig ist, werde ich von dem Grill ein Foto posten. 

Zurück zu dem Thema, mit dem ich angefangen habe. Die Erntezeit rückt näher. Und jedes gute Grillfest, um das Ende eines Sommers zu feiern, braucht etwas Dekoration. 


I decided to make the bunting with plain brown fabric (which looks a little bit like burlap) and create the vegetable applications from felt. I will show you more of the felting process in the next post. 

Ich habe mich entschieden, die Fähnchen aus braunem Stoff (der ein bisschen wie Sackleinen aussieht) zu machen und die Gemüse Applikationen aus Filz. Ich werde in der nächsten Post mehr über den Filzprozess schreiben und zeigen. 


Wednesday, 28 August 2013

NEON Warrior - Melinda


The Neon Warriors Melinda and Ricky were playing hide and seek in the forest. I guess, Ricky is still in his hideout, so I have to start introducing you to Melinda and hope that Ricky appears later.
Melinda has a soft soul and loves to stroll around and to daydream. She likes to rescue butterflies which fall into the sea. Her favorite dish is freshly baked midnight pancakes. Juddering fridges at night make her scared.


Die Neon Krieger Melinda und Ricky haben "Verstecken" im Wald gespielt. Ich vermute, Ricky ist noch in seinem Versteck. Also fange ich erst einmal an, Melinda vorzustellen, und hoffe, dass Ricky später noch auftaucht. 
Melinda hat eine sanfte Seele und liebt es, spazieren zu gehen. Sie mag Tagträumen und rettet gerne Schmetterlinge, die ins Wasser gefallen sind. Ihr Leib- und Magenspeise sind frisch gebackene Mitternachtspfannkuchen. Brummende und wackelnde Kühlschränke in der Nacht machen Melinda Angst.


When doing the recherche for the Aztec warriors, I noticed that they didn't wear typical war paint as we know it from the Native American. Therefore, I decided in opposite to the sketches, not to have them a war paint on their faces at all. 

Bei der Recherche über die aztekischen Krieger ist mir aufgefallen, dass es bei ihnen keine richtige Kriegsbemalung gibt, wie wir es von den amerikanischen Ureinwohnern kennen. Deshalb habe ich mich entschieden, im Gegensatz zur der Vorzeichnung, die Bemalung wegzulassen.


I fell in love with the folk art and patterns of South America such as those from Mexico and Peru. I definitely want to order fabrics from there and make soft toys out of them.

Ich habe mich in die folkloristischen Motive und Muster Südamerikas verliebt, wie z.B. aus Mexiko und Peru. Ich will mir unbedingt Stoffe von dort bestellen und Stofftiere daraus zu nähen.


I find Melinda very cute without the feathers on her head. So I decided not to sew the head dress on, and to make it removable.

Ich finde, Melinda auch ohne ihren Federschmuck sehr süß. Deshalb habe ich mich entschieden, den Kopfschmuck abnehmbar zu machen, und nicht festzunähen.


Tuesday, 13 August 2013

The NEON Warriors


Here's is something I am currently working on.
I call them the Neon Warriors. So far they haven't introduced themselves by name.
Below you can find some sketches I made in preparation for the sewing project.

Hier ist ein Projekt, an dem ich gerade arbeite.

Ich nenne Sie die Neon Krieger. Weiter haben Sie sich mir bisher nicht vorgestellt.
Unter dem Text findet ihr eine Vorzeichnung für die Nähidee.  


This morning I got started. I cut out the pieces for the body, legs and arms. The Aztec shapes are made of geometric patterns of felt which I glued onto the underlay. Luckily I found some NEON pink, orange, and green felt at the local market. Tomorrow some pretty sewing and then - how exciting - we will see how they look in real life.

Heute Morgen habe ich damit begonnen die Einzelteile für den Körper, die Arme und die Beine, auszuschneiden. Die Azteken Muster sind aus geometrischen Formen aus Filz gemacht, welche auf einen Untergrund geklebt sind. Ich freue mich, das ich NEON pinken, - orangen und - grünen Filz auf dem Markt gefunden  habe. Morgen dann Nähen, und dann - wie aufregend - sehen, wie Sie sich im richtigen Leben machen.


Google Analytics Alternative