Sunday 29 September 2013

Tutorial for a DADA Sound Poem


The following idea is based on an exercise by my former Art teacher Mr. Rose in college.
I had so much fun when doing it and learned so much on DADA and Art history, that I want it to share with you. 

I love love love DADA! It's a source of inspiration for me, because of its multi media use, its nonsense and absurdity.

I don't know how popular DADA is, so I guess I’ll just start with a short introduction.

DADA was an art movement in the early 20th century of the European avant-garde. It started probably in Zürich around 1915 and then spread to Berlin, New York and other cities. Artists protested against the First World War and the bourgeois culture with provocation and satirical nonsense. DADA inspired Collage, Photomontage, Assemblage, Ready Mades and Sound poetry. Famous artists involved where Max Ernst, Salvador Dali, Hans Arp, Marcel Duchamp and Kurt Schwitters.

Sound poetry uses the phonetic aspects’ of human speech.
 In times of DADA it was often part of a public performance. Here is a famous poem by DADAist Hugo Ball:

Karawane
jolifanto bambla ô falli bambla
grossiga m'pfa habla horem
égiga goramen
higo bloiko russula huju
h`ollaka hollala
anlogo bung
blago bung
bosso fataka
ü üü ü
schampa wulla wussa ólobo
hej tatta gôrem
eschige zunbada
wulubu ssubudu uluw ssubudu
tumba ba- umf
kusagauma
ba- umf

If you are brave enough, print out the sound poem "Karawane", position yourself in the middle of your living room; maybe with a few unlucky spectators and read the poem out loud ... have fun!


You should now have an idea of sound poetry and maybe even had a go at it. Now how about making your own sound poem...


What you will need:
- Different magazines
- Scissors
- Cardboard or drawing paper
- Glue


  • Get some magazines and start cutting out different headlines. The letters should be 1/3 cm high (0.4-1.2 inches). If you have different magazines, you have a better chance of getting words in different typography and colours, which will make the visual later more interesting


  • Get a good pile of words. Cut out the words into different letters and sort them into the alphabet. A few letters each is enough, otherwise it becomes an exercise in OCD. 


  • Get the cardboard, scissors and some glue and get started imagining some new words. A sound poem is an acoustic experience. It helps using lots of vowels and nice sounding letters like R, K, P, S and Z.


  • And Voilà. You can frame your work for display – and remember to rehearse in case someone asks what it is.


Tuesday 24 September 2013

Welcome to the jungle - the felefant


I know it is written elephant not felefant, but there is something I remember from primary school in Germany, a book when I started learning to read. In this book somebody tells someone else that the telephone is ringing, but instead of saying telephone, they say feletone. I remember that I used to say feletone instead of telephone at home for a long time, and still love to do so. To cut a long story short, it's a felefant, not a ... No, that doesn't work. Anyway ...


I’m fascinated with the festive decorated Indian elephants, embellished with vibrant colours, saddle cloth and heavy jewellery. I love the illustrations of elephants carrying the Maharaja on their backs and photos of Indian elephants at festivals in the National Geographic. 
These Indian elephants present a wonderful theme for arts and crafts, especially for soft toy embroidery.


This fabric is an old bed sheet. When I saw it for the first time I was excited about the patterns and the possibilities it presented.
As the pattern reminded me of the embroidered blankets which festive Indian elephants wear - I tried to use this association by using the cut of the fabric to mimic this. I then had the option of embroidering the fabric in a more traditional way. I decided to reference the colours that they are decorated with, by using these sequins.

I love the mixed sequins bag that I found in Poundland. It’s like a lucky dip bag and you never know what you get. I think lucky dip bags are underrated! Why aren't there any lucky dip bags for adults?
For the first picture on top of this post, I used the green leaves picures of my boyfriend office.


For the other pictures I wanted something more crafty, more me. So I decided to use the old curtain fabric for some scenery, cut out some green felt in the shape of leaves and use the temporary fabric adhesive to glue them onto it. Like this, the set up is quick, and I can re-use the materials later. 


Friday 20 September 2013

A new member of the pebble family arrived - Selen

I miss making soft toys. I'm still working on the harvest bunting to finish, but it takes longer as I'm stiching the names of the each vegetable and fruit on each bunting.
To have a little detour from this work (I don't want to work on too many projects), I made a little friend for Camilla, the dancer Selen. 


It's fun to capture the character of a soft toy in just a few details. The idea behind the Pebble Family dolls is that they're easy for children to play with. Like finger puppets, they're small. Without too much detail the kids have more room to use their imagination. Because they are filled with rice, they are heavy enough to stand upright, which allows the kids to play with them in a doll house or landscape. 

Selen came here, to learn new dances, like Salsa and Cha Cha Cha. 

While she was making herself home, she discovered my Wii Let's Dance and Zumba games. Because she's quite a person, my boyfriend has no chance to play Grand Theft Auto, which is at least not to my loss :)


Selen making a pirouette ....

Tuesday 17 September 2013

My favorite arty-handmade indie music clips

My brother Michael visited me last week and I had an awesome time showing him Newcastle and the surrounding area. He dedicated some time to do a few updates on my blog and now I am connected with Pinterest, Facebook and Bloglovin. I'm still learning so much on blogging right now, but it's good to have these box now ticked.

I will start blogging more frequently than once a week. I have lots of ideas and I can't wait to share them.

For today, I want to post my Top 3 arty-handmade indie music clips. 


Peter Licht - Neue Idee
Peter Licht is an indie electropop musician and author from Germany. He is best known  for his 2001 single "Sonnendeck", winning the Ingeborg-Bachmann Preis 2007 with his short story "Die Geschichte meiner Einschätzung am Anfang des dritten Jahrtausends" and his published book "Wir werden siegen!", which is full of quirky sketches, thoughts and poems. 
The song "Neue Idee" came out 2011. The musicclip was made by the student Amelie Lihl of the Bauhaus-University Weimar. She used a  technic to perforate paper with a needle and illuminate the paper with back lighting She used several hundred single pictures to turn them into a little film. It's beautiful.


If you want to see a short making of, please have a look at the link below. It shows Amelie Lihl while working on perforating the paper and then taking photos to turn it into a film. http://vimeo.com/28145196


Breakboot - Baby I'm Yours feat. Irfane

Thibaut Berland is known by his stage name Breakbot and is a french producer and DJ.
The song "Baby I'm yours" came out 2010. The watercolour pictures were painted by Irina Dakeva, who put together ca. 2000 pictures to turn them into this music clip. I love the colours and well, the tune!


Laserkraft 3D - Nein, Mann!
Laserkraft 3D is a German Electro-House project. Both members Niels Reinhard and Tim Hoffmann studied digital media before they became famous as musicians. For their second single "Nein, Mann", they directed their own music clip with effects of ultraviolet light. It's a simple but funny video and it became so popular on YouTube, that the song entered the German Dance charts in autumn 2010.


Wednesday 11 September 2013

Tutorial for a Tipi Triangle Picture


I'm currently painting pictures to decorate our house. While I was doing the Triangle Picture, I thought, it could be an interesting thing to share. I hope it inspires you! :)

What you will need:

- 220 gsm Drawing Paper (strong surface for repeated working), a few A3 sheets
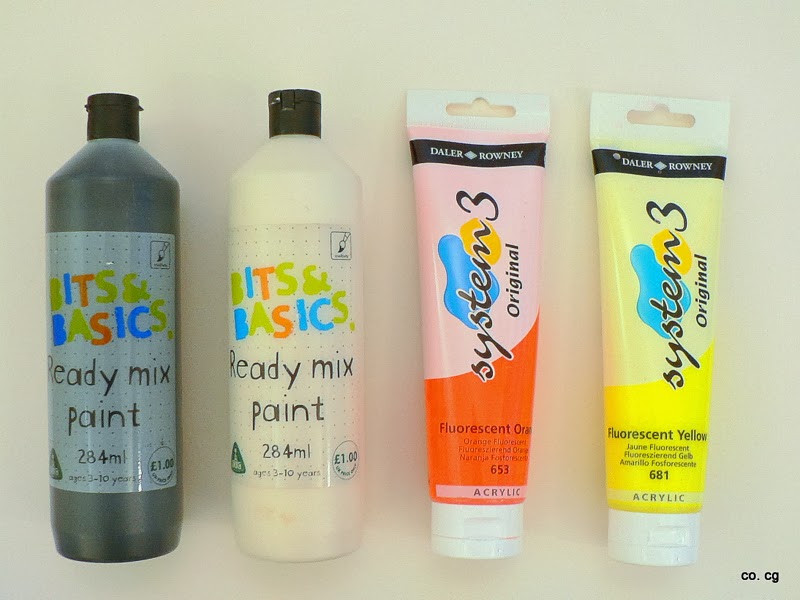
- Colours: black, white, NEON orange and NEON yellow
- Permanent Marker
- Cardboard for the stencil
- Pencil, rubber, scissor, set square or ruler
  1. At first you need to apply a white foundation to the backround paper. This gives it texture and adds depth  to the picture.
  1. While the white paint is drying, you need to figure out what colour palette you want to use for the triangles. I went for:
    • NEON orange pastel shades (NEON orange mixed with white)
    • NEON yellow pastel shades (NEON yellow mixed with white)
    • Grey (black mixed with white)
    • Black


  1. Then you have to paint different sheets of paper with the colour shades. 2-3 coats makes the paint opaque. I love to paint with a coarse bristle brush, which adds structure and leaves the bristle lines visible. 


  1. For the stencil, you need cardboard paper, a pencil and a set square. First, draw a 4cm x 4cm (about 1.5 x 1.5 inches) square. Then half the top line of the square. Join this point with the two edges that lie on the other side of the square. Voilà, the shape of a triangle. Cut it out and use it as a stencil to copy the shape on the rear of the painted paper. Now, you can cut out the triangles.


  1. A good tip is to use a black permanent marker to colour the cut edges of the black triangle. Later, when the black triangles are applied on the picture, it will make them look more plain and clean.


  1. Once you have a good pile of each colour, place them randomly on the picture. You can decide to have one colour slightly more than another in one area, but normally it's best not to be too conscious about your choices.


  1. Use the black triangles sparingly, as it is the most solid colour. Maybe 4 - 5 pieces are enough.


  1. Now you can glue the triangles to the picture. To finish, cut some of the triangle in half and glue them to the sides of the pattern to make the final impression of the picture square complete. While the picture is drying, I placed some heavy books on top of them, so that the triangles are glued flattened to the paper (the complete hardback edition of Lord of the Rings is always handy).


  1. Once dry and framed, enjoy finding a suitable spot in your home to hang your handiwork and enjoy :)


updated 20/09/13

Friday 6 September 2013

Bunting with felt vegetable applications - Part 2

To give you a little update of how far I got with my bunting project, I will post some pictures.
I decided to add application of felted fruit for more variety, but I have kept close to my main idea; to have a harvest bunting, with fruit and vegetables that you can grow in your garden or green house.

Um euch ein kleines Update zu geben über mein Fähnchen Projekt, werde ich ein paar Bilder posten. 
Ich habe mich entschieden Applikationen von Früchte mitaufzunehmen, um dem Thema mehr Vielfalt zu geben. Dennoch bleibe ich bei meiner Idee, ein Ernte-Girlande zu machen mit Gemüse oder Früchten, die im Garten oder im Gewächshaus wachsen. 


Google Analytics Alternative